


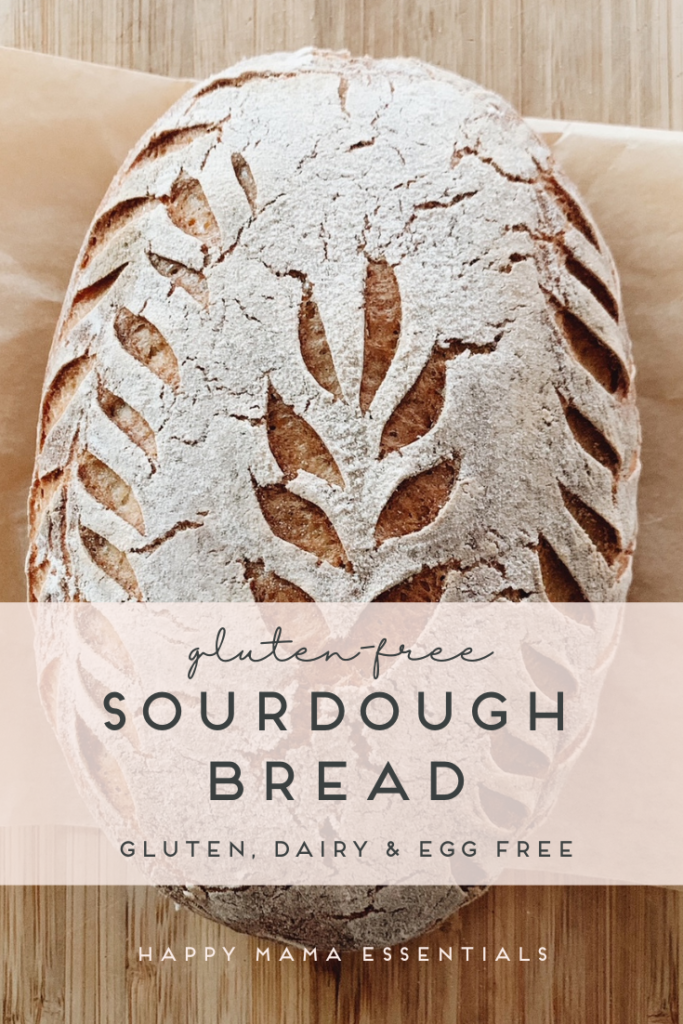
I’m so excited to share my go-to classic gluten free sourdough bread recipe with you. This recipe is gluten-free, dairy-free & egg-free and can be used to make sandwich bread in a classic loaf pan or used to make boule french loaves or rolls and easily used for sweet or savory mix-ins.
This is our go-to recipe, it’s..
- Easy to make
- Super flavorful, fragrant and versatile
- Wholesome and hearty
- Reminiscent of gluten-filled breads
- Gluten-free
- Dairy-free
- Egg-free
- Nut-free
- Refined sugar-free

When I first started making gluten free sourdough bread, I stuck with the recipe from Rachel at Bakerita Blog, but I also wanted to simplify it so I could use less ingredients and pull the dough together faster.
Less measuring, less ingredients, less time in the kitchen and more time with the family or available for other things. I also branched out to try the recipe from A Couple of Celiacs, her book is another great resource – but some of the steps also felt very involved with many loaves taking more than a day to accomplish. With both, I stuck with their baseline recipe and adapted from there – bringing forth the recipe below!
Sourdough is a process. Factors like ambient air temperature where you live and in your kitchen, water hardness and temperature, different brands of flours and how fine it is all are contributing variables and will create small variations.
Trust the process – learn what works for you. Go by how it feels – whether the consistency of your starter to how the dough looks and feels as you knead it. When we moved from Oregon to Texas, my proofing times changed significantly and I used a little less water – it took a few loaves to figure out and get it right. So know the measurements + timing in this loaf may vary a little for you.
If you’re in a cool place, or if your starter is new and not very mature yet, you’ll want to add a higher amount of starter and/or let the bread proof longer. Or if you live somewhere warm & humid, your proofing time will likely be shorter. If your loaf is proofing too quickly – then you can decrease the amount of starter to give your bread enough time to proof and develop without overproofing. (see notes on this at the bottom).
Start with these baseline measurements below, then see if you need to add a tbsp or two of flour to the dough or add/subtract 30-45 minutes to the proofing time. Make notes for yourself to build upon.
Let’s chat ingredients – First, I recommend measuring everything out in grams but feel free to mix & match your flours. I’m using an all purpose gluten-free baking flour that is wonderful for bread (that I wish there was an organic option for). I chose this after trying several options and even cup for cup gluten free blends, but the results were always sticky. You are welcome to test out and try your favorites. Note, if you use a different flour blend, omit the xantham gum if it’s already in the flour blend you use. You can take the same grams and divide it up with different flours if you choose.
Using more whole grains like sorghum, millet, and buckwheat will give you a denser and more nutrient-rich bread. Using more starches like tapioca, potato starch and arrowroot will yield a lighter, fluffier bread.
The psyllium husk is your binding agent – be sure to use whole psyllium husk. This adds some nice texture and helps retain moisture in the bread, you can try the recipe without it, but I haven’t tested this.
Lastly, I have all my top picks + favorite supplies we use from proofing baskets to scales & dutch ovens all linked here.

CLASSIC GLUTEN FREE SOURDOUGH BREAD:
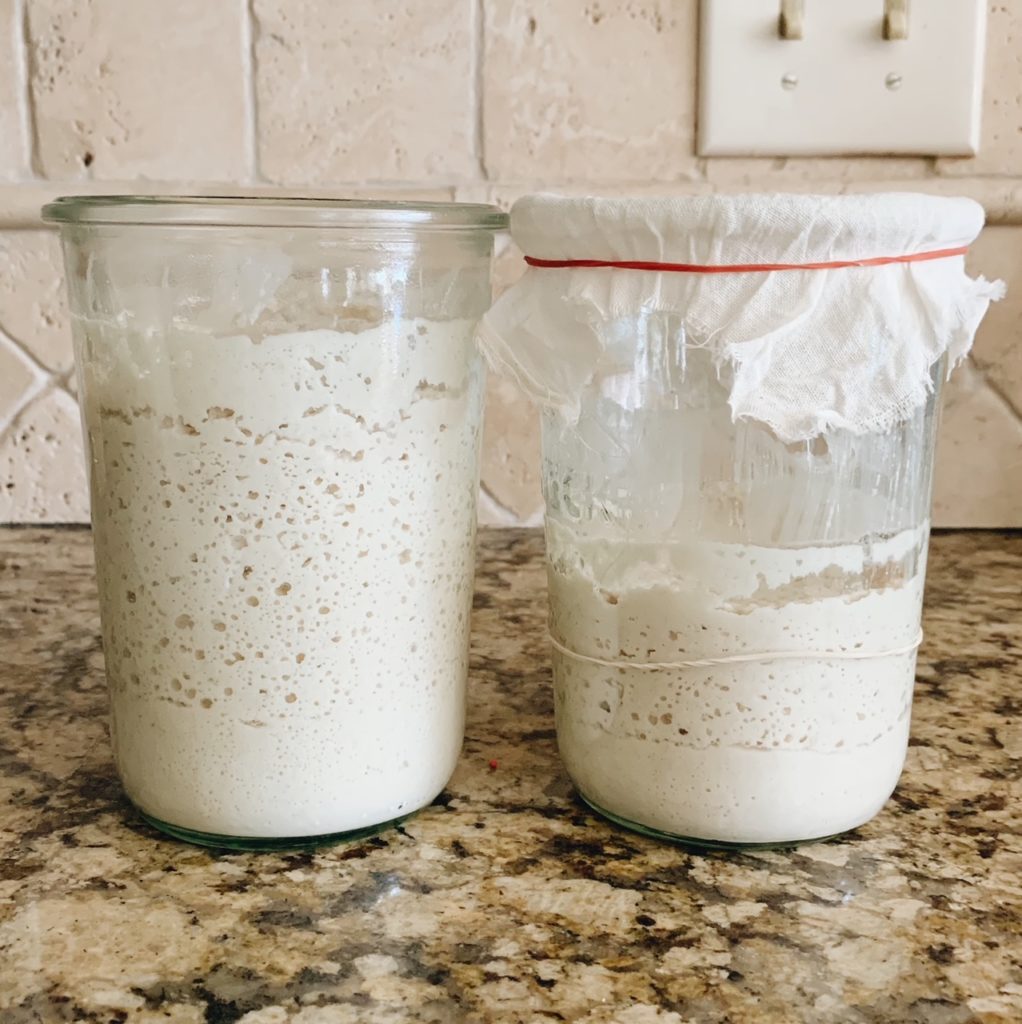
First, feed your starter 1-2x in the 24 hours before making this recipe to ensure it’s good & active. You’ll know your starter is ready to use when it doubles in size. You can then do one of two options:
- If you want to use starter right from your jar, start with 120 grams and do a big feeding of 100g brown rice flour + 100g warm water. This ensures you have at least 280g of starter available with about 30-40g left over. Allow to rise/double before making recipe.
- Or build a levain/preferment (this is the easiest option in my opinion): In a second jar or a bowl, add 100g of active sourdough starter + 90g brown rice flour + 90-100g warm water. Allow to rise/double before using in recipe.
If you’re gluten free and needing a sourdough starter, I can send you some of mine!
INGREDIENTS:
- 280g active gluten-free sourdough starter/levain (see notes above)
- 320g warm filtered water
- 10g psyllium husk
- 15g xantham gum
- 15g maple syrup
- 350g 1:1 gluten-free all purpose baking flour
- 9g sea salt
PREPARE YOUR DOUGH:
- Using a food scale, measure + combine the warm water, psyllium husk & maple syrup in a measuring cup or glass bowl and allow to gel.
- In a large mixing bowl, measure + combine your gluten-free flour + sea salt.
- Add your psyllium mixture to the flour then mix in your active starter/levain.
- Mix dough with a dough whisk, by hand or in a stand mixer on medium/low until dough comes together. If dough is still wet and sticky, add 1 tbsp 1:1 flour at a time until dough comes together and is smooth.
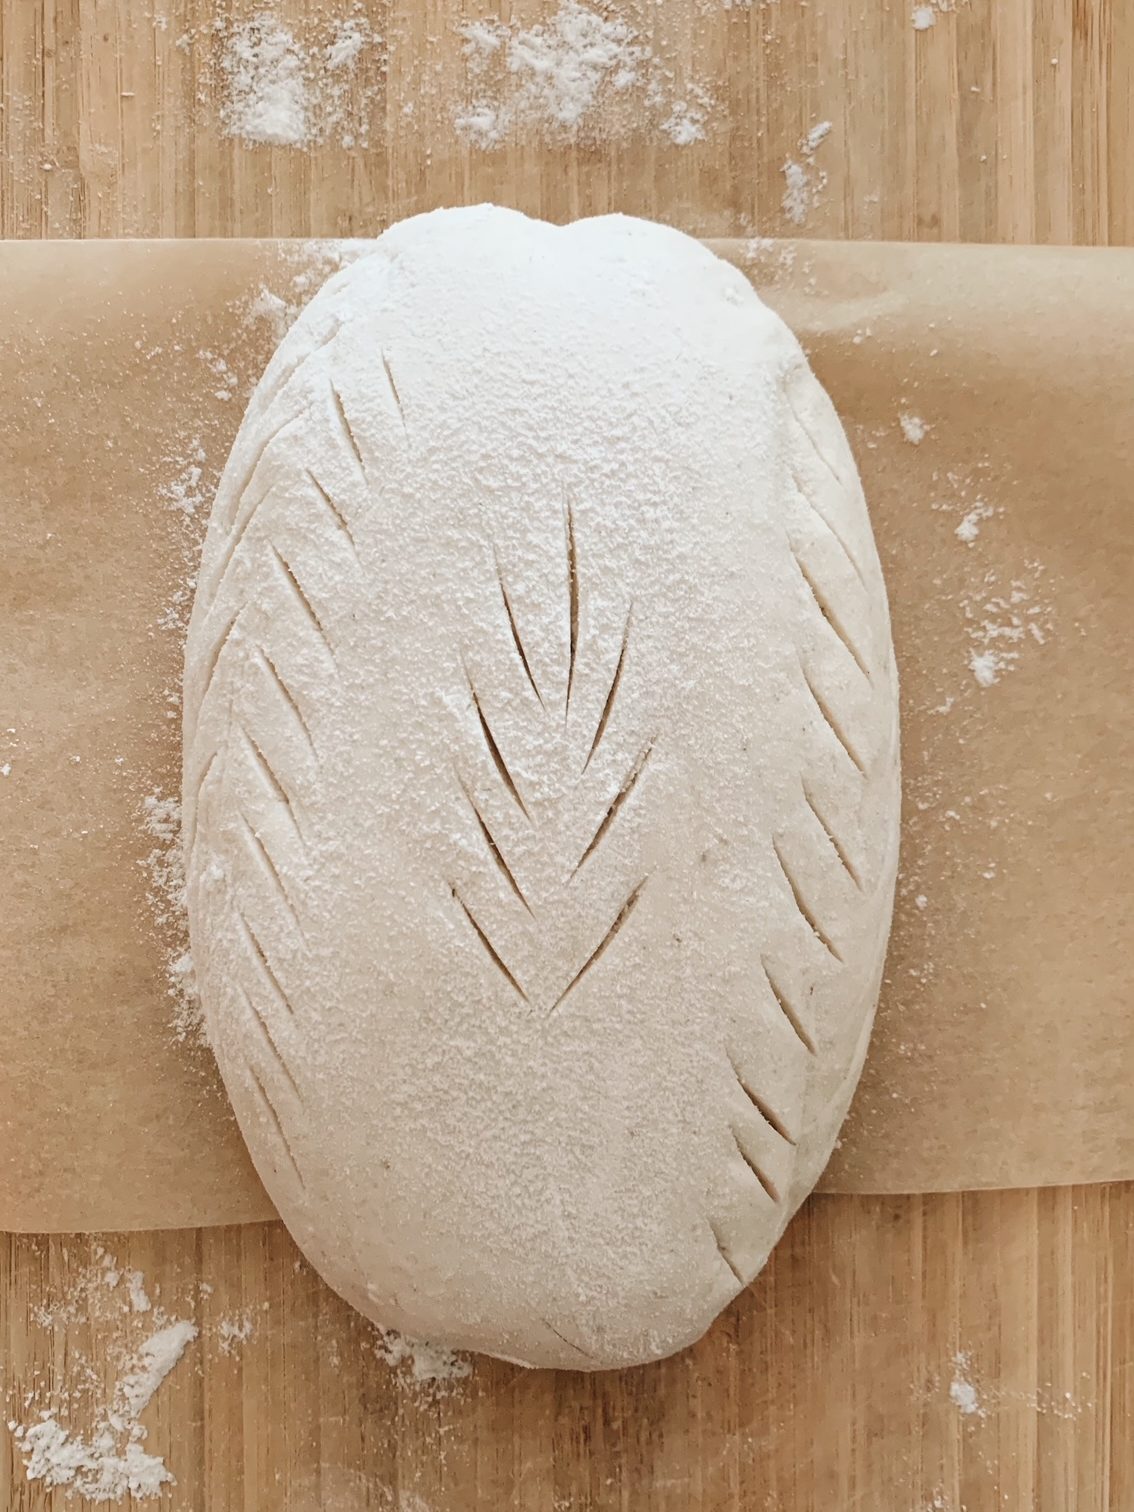
- Remove dough from bowl and knead on a lightly floured work surface and form into a round or oval shape. Add 1 tbsp of 1:1 gf flour if dough feels wet.
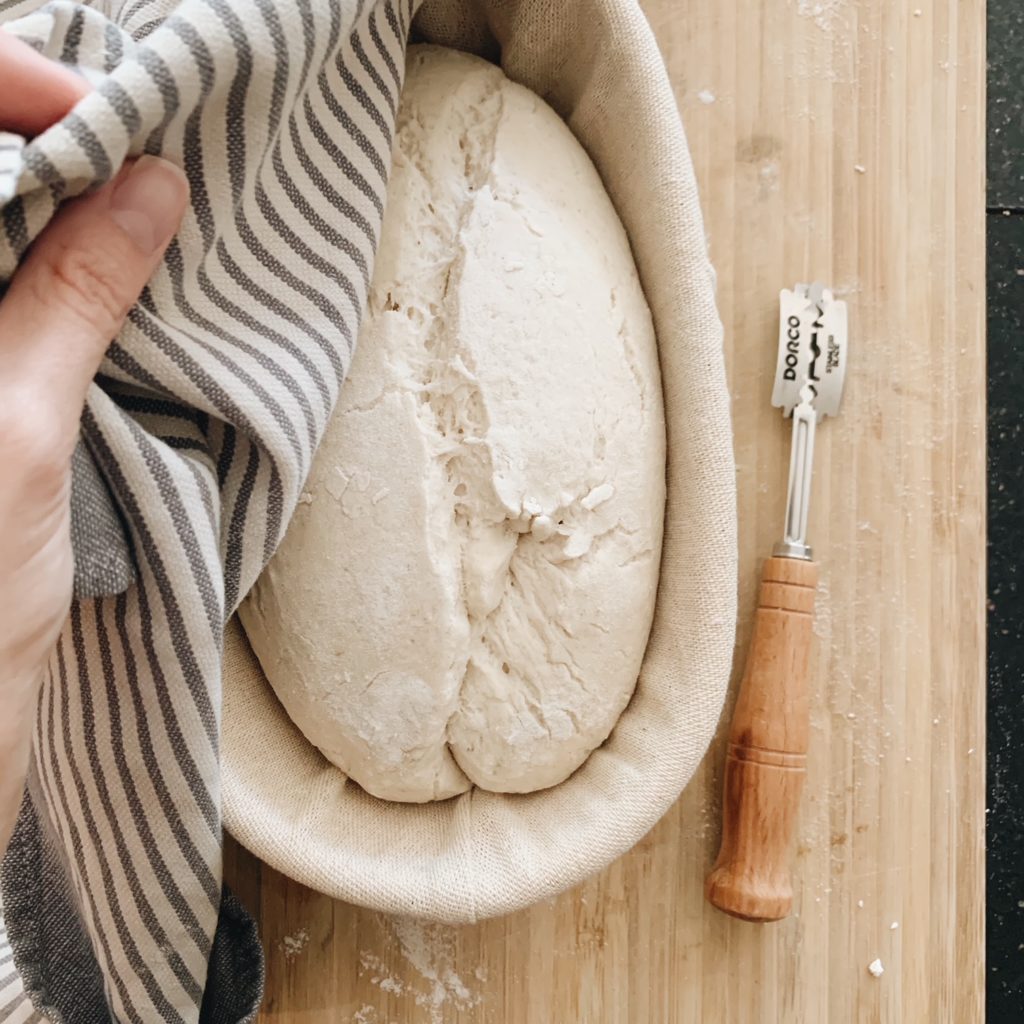
(TIP: using cold water on your hands helps the dough not stick and is also the fastest way to wash off any dough that sticks to your fingers). - Lightly flour or line your banneton or proofing bowl with a towel. Transfer your dough to the bowl with the smooth side down, and any “seams” up.
NOTE: If you are using a sandwich loaf pan, place seams down and proof your dough in the pan. - Cover with a tea towel and proof for 2 1/2 – 3 hours at room temp or in the oven with only the light on. You can also proof your loaf overnight in the refrigerator, which also helps develop a more sour flavor.
WHEN READY TO BAKE: - Check your dough after 2 hours. If your dough has been proofing in the oven, remove it and carefully set aside to not disturb. Allow your dough to continue proofing 30-60 minutes more. Checking every 30 minutes. Note, the dough may note “double”, but will be soft & spring back just slightly when pressed.
- Place your Dutch oven inside the oven and preheat to 425 degrees (this allows ample time for your dutch oven to get up to temperature.
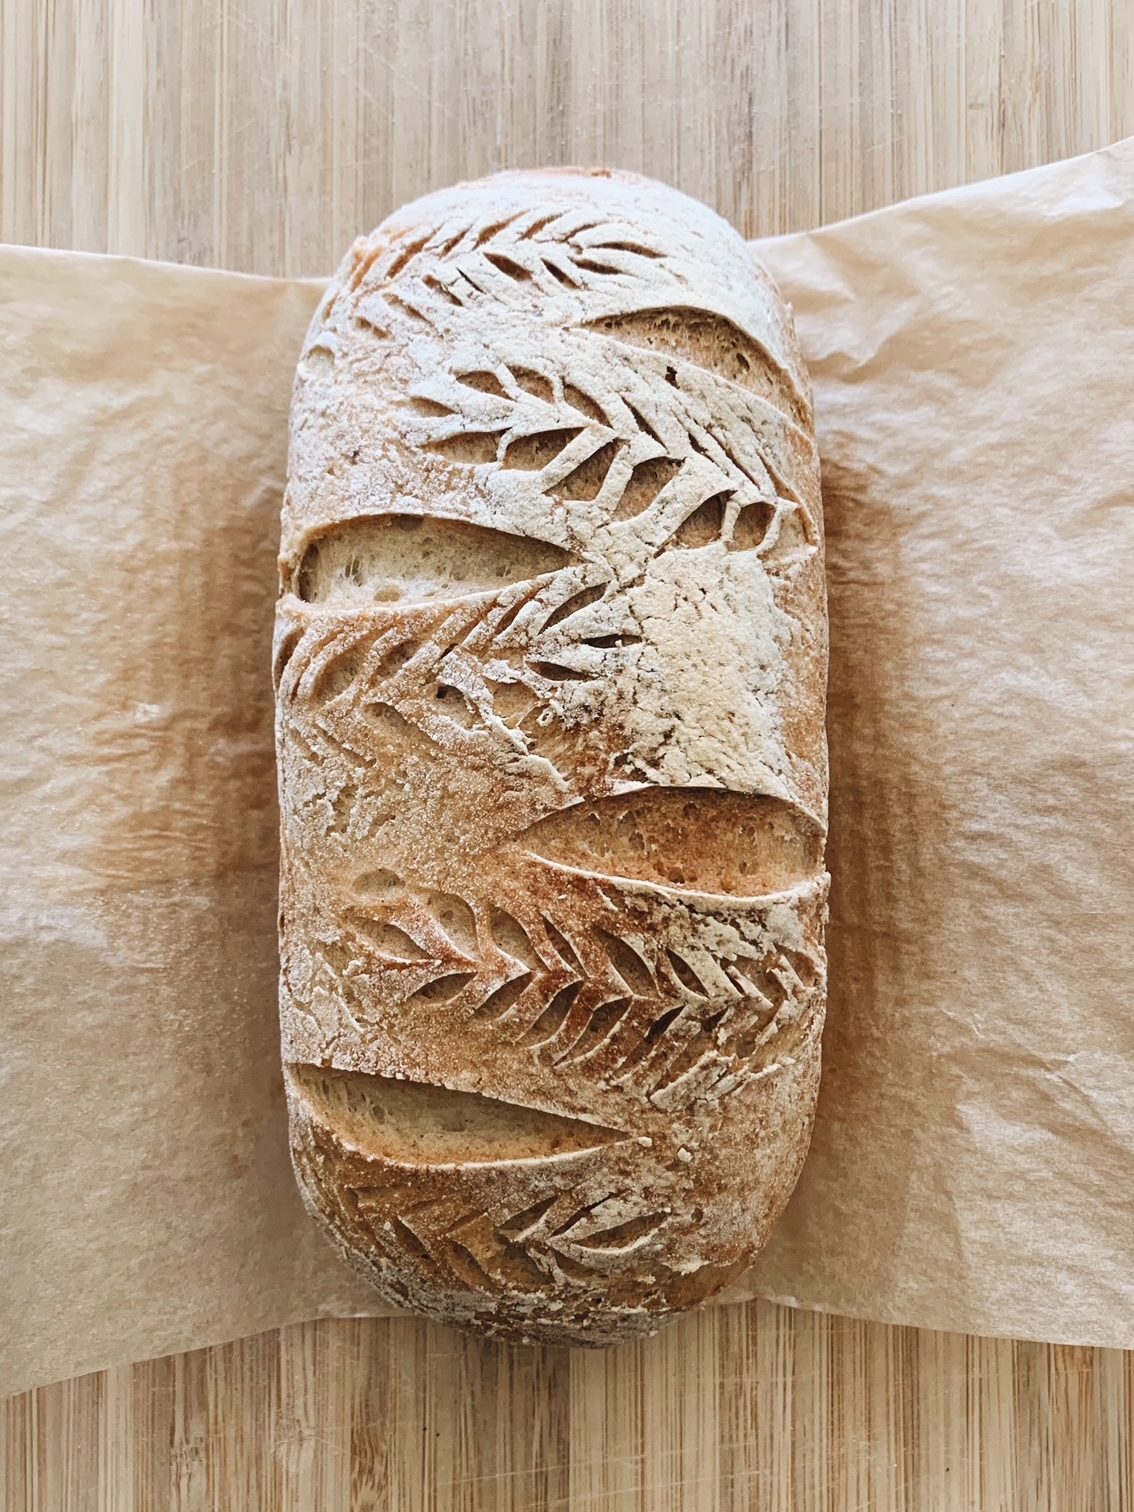
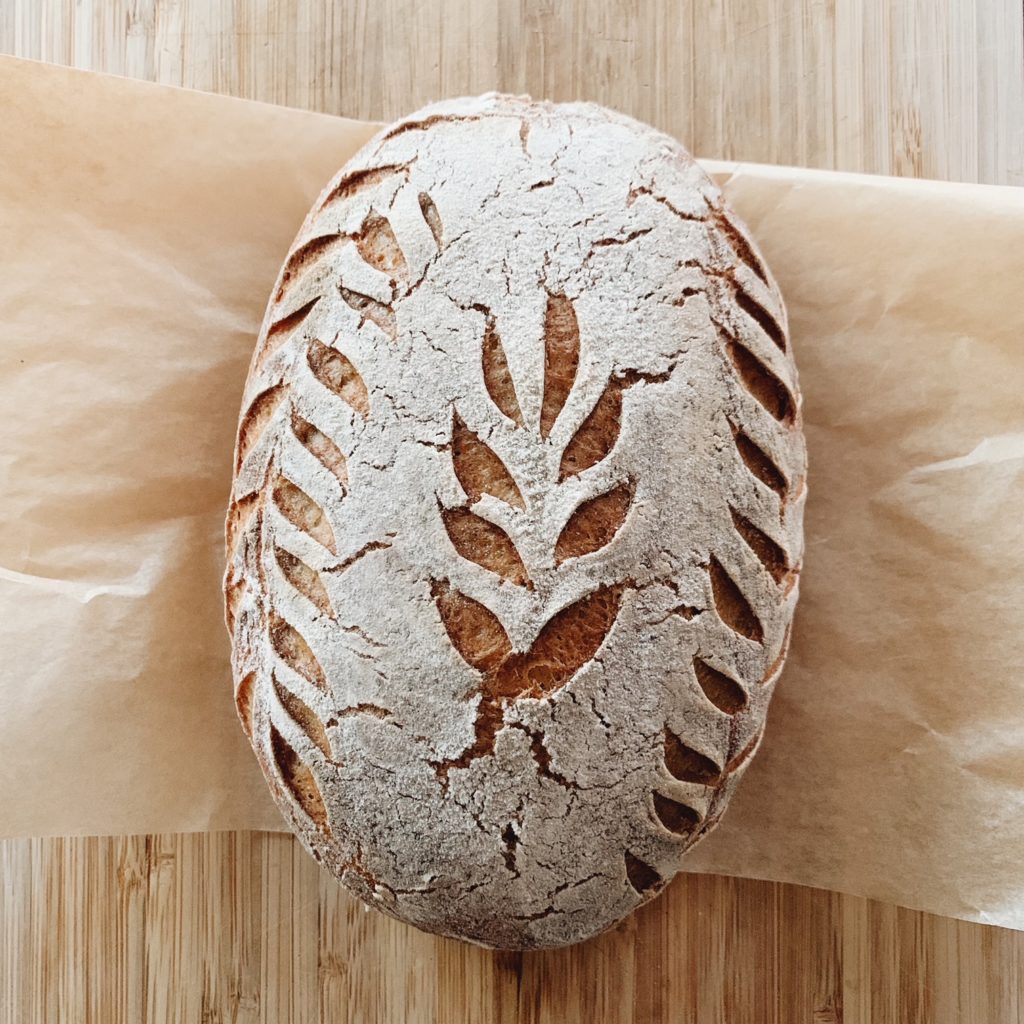
- When your dough is proofed, turn dough out onto a folded section of parchment paper (think of this as a sling that makes it easier to transfer to a hot dutch oven). Score your bread as desired, cutting in at least 1/4-1/2 inch – this allows steam to escape. Without scoring, your loaf will naturally crack.
- Remove hot Dutch oven from oven and carefully lower your dough into the dutch oven, careful not to drop which will deflate your bread and cause gumminess. Replace lid and place in oven.
Bake for 45-50 minutes. - After 45 minutes, remove lid from dutch oven. Reduce temperature to 400 degrees and continue baking 35-50 minutes until golden brown on top. The exact time will vary depending on your oven and how golden you want your bread. When done, remove Dutch oven from oven and carefully remove loaf from dutch oven using parchment paper as a bread sling to lift up & out.
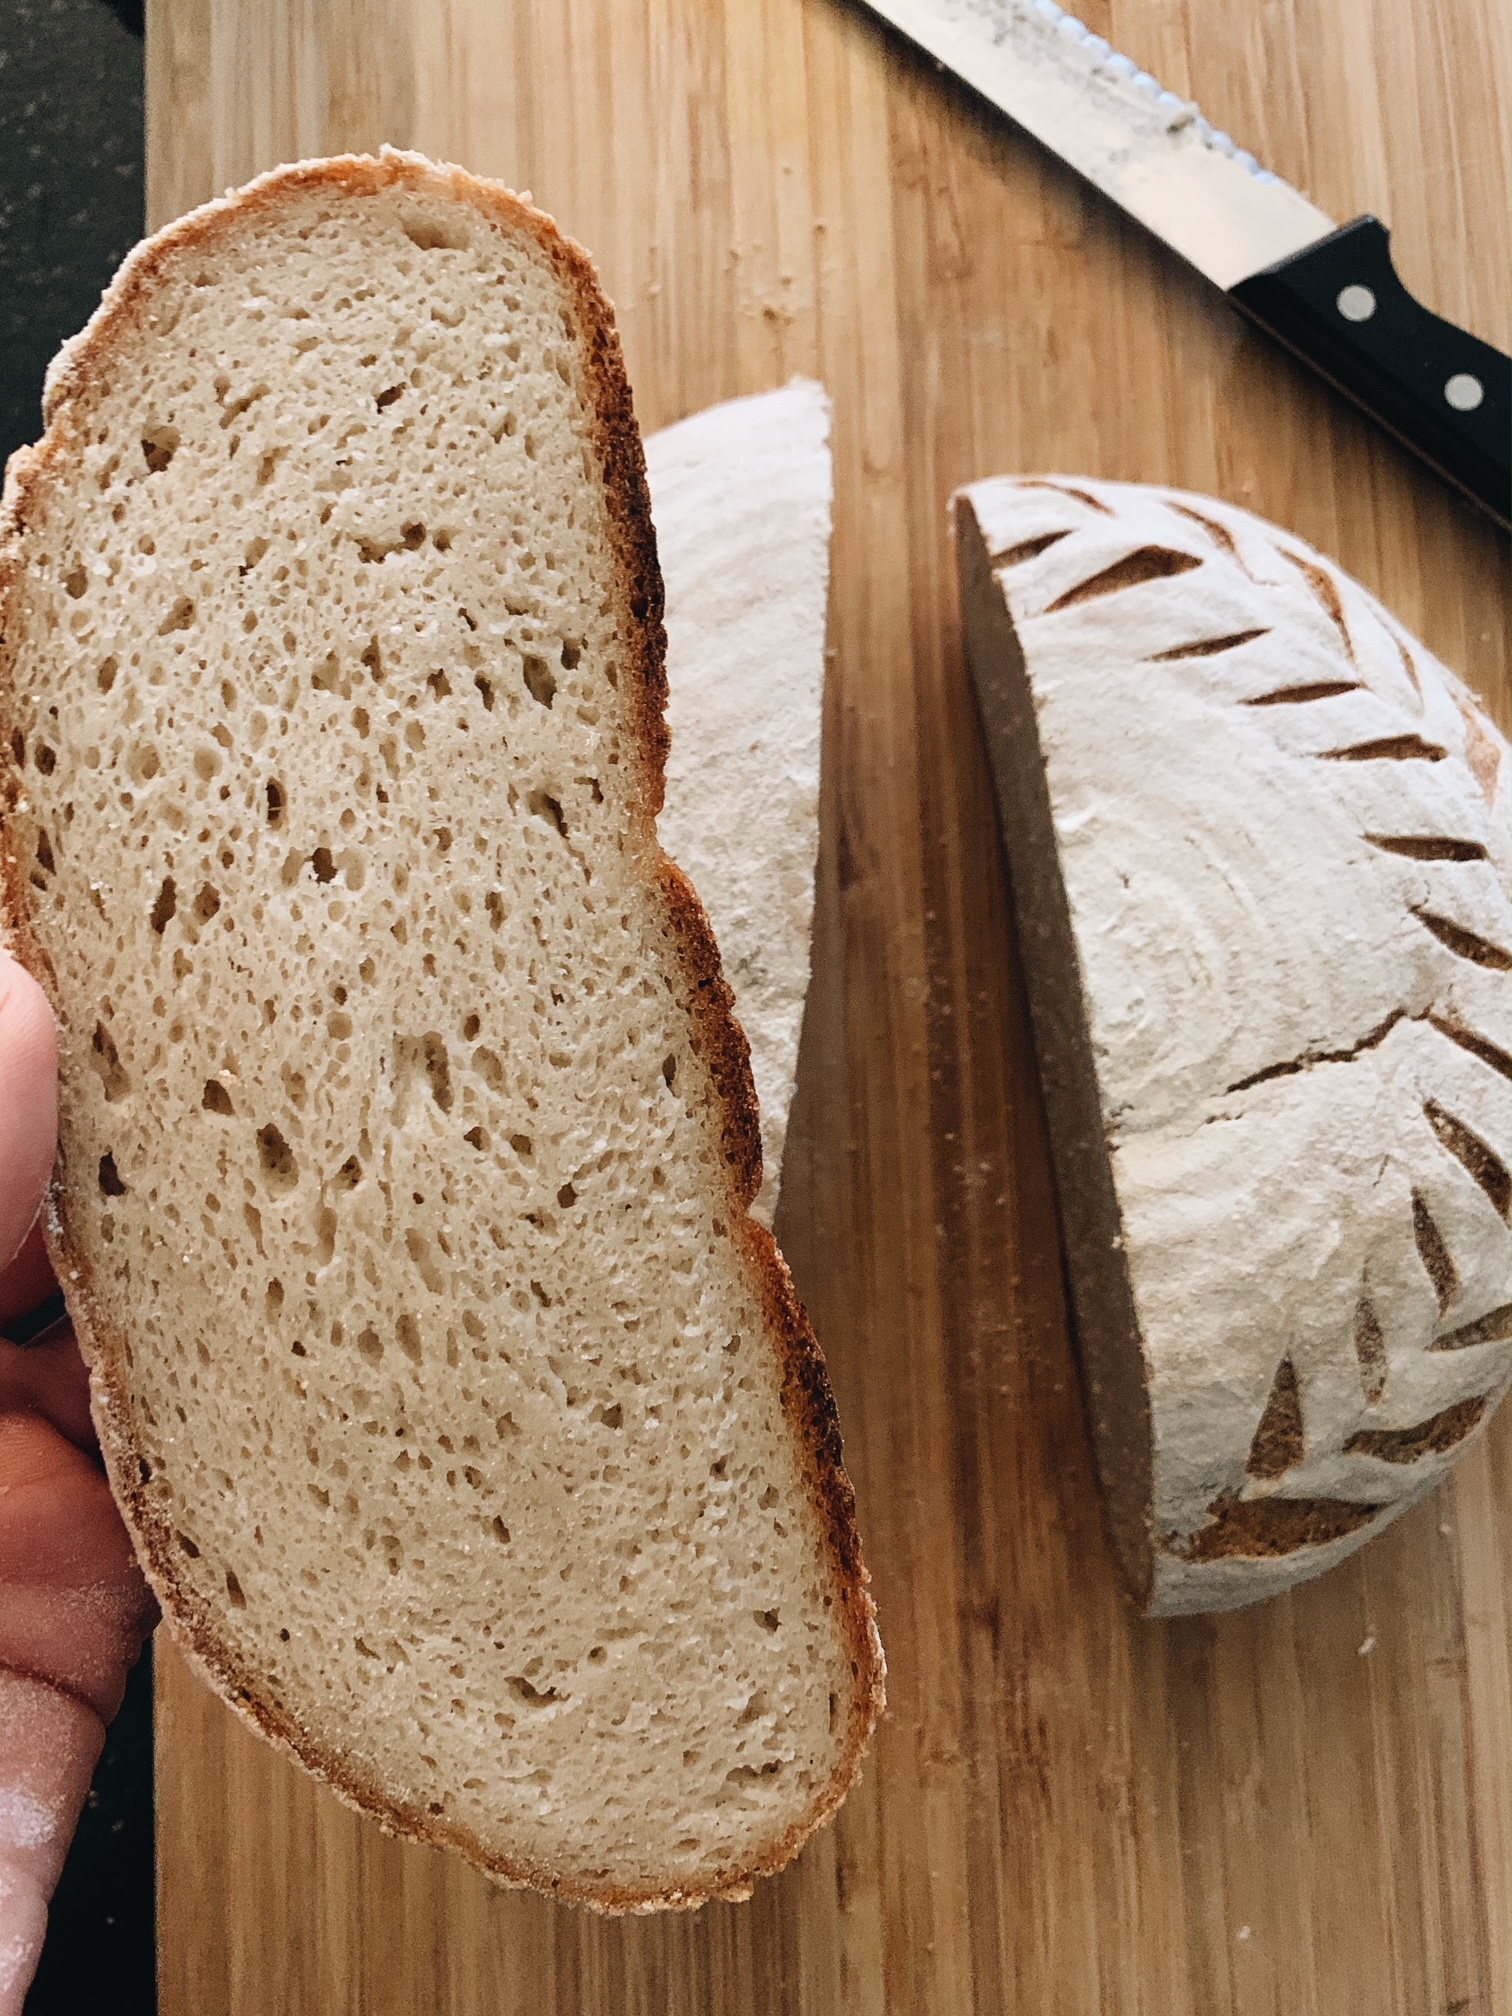
Allow to cool completely before slicing – this is the hardest part, but worth it for the best texture. After slicing in your loaf, store in a tea towel, linen bread bag or beeswax wrap and store on the counter for up to 2 days. Sourdough also freezes well – store in slices or cut into cubes for croutons or bread pudding.
We love to pop a slice of gluten free sourdough bread in the toaster and smear with raw honey butter or dip into olive oil + balsamic vinegar! We also love to make egg-free french toast.
NOTES:
If your bread is over-proofed, when you cut into your bread, you’ll see a big gap at the top of your loaf, between the crust and the rest of the loaf, and it will likely be dense and gummy at the bottom, where the dough started to settle. To fix an over-proofed loaf (before it goes into the oven), you can punch it down, knead it and shape it again, and allow it to rise a second time.
If your bread is under-proofed, you’ll barely have any bubbles and your bread will be dense and gummy.
For more tips & resources on making gluten free sourdough:
Recipe I started with from Bakerita Blog
Troubleshooting guide from The Art of Gluten-Free Baking
This Guide + Recipe from George Eats
I hope you enjoy this gluten free sourdough bread recipe as much as we do! Feel free to comment below or send me a message if you have questions, I’m happy to help! Gluten-free bread is different from those containing gluten, but it’s well worth the couple extra steps to enjoy delicious hearty bread again!
I can’t wait to see all your gorgeous loaves of bread, tag me on instagram so I can see!

About how many extra tablespoons of flour does it take for the dough to come together? I end up adding like 10 extra tablespoons and that seems like a lot 😬 maybe it’s because it’s in my KitchenAid with a dough hook
I mixed with my hands and had to add a bunch of extra flour too. How did your loaf turn out? I just took the lid off mine in the oven and I’m not super optimistic lol
What is the rest of the instructions on number 8? I’m curious to know how we know it is done proofing. Thank you! I’m 5 days into my starter and getting excited to bake a loaf!
Just seeing this! I updated the post, not sure how the rest of 8 was deleted, but the dough will be soft and just barely bounce back if you press in
Can raw honey be used in place of the maple syrup?
Yes! I haven’t tried it personally yet, but I know others have!
Just curious if we can replace the xanthan gum with more psyllium husk? I don’t have it, and another recipe I have tried didn’t use it 🙈
You can omit it if needed. The bread will be a little denser, but still turn out great. I prefer it with since it helps provide structure for gluten free breads, cakes etc instead of the gluten protein.
Ohhh, I didn’t know it helped with the density! Thank you!
Can I omit the psyllium husk?
You are welcome to try without, I did for one loaf myself just to see, but it was very dry & crumbly. The psyllium husk is a great binder and is needed for structure.
You reference in the recipe that you could use a sandwich loaf pan. How would you adjust the bake since you aren’t using a Dutch Oven?
Great question! I follow the exact same steps. I leave uncovered for the first half of the bake time, and but will use a piece of foil over the top the second half to keep it from getting too dark/crispy on top.
I just followed the recipe step by step. My bread turned out beautifully! If I could figure out how to submit a photo I would. I’ve been gluten free for four years now and haven’t found a good substitute for fresh baked bread. This is my second attempt at a loaf using my potato starter and I’m so impressed with the texture and taste! I was curious, since I used a potato started the flavor was very sweet. Do you have a recommendation for how to get more of a classic sourdough taste?
Hi Madison, that makes me SO happy to hear! literally happy dancing for you and thank you for the great feedback! As far as a more classic sourdough taste, you could try letting your levain sit a little longer before using in your recipe, it may not be at peak rise, but I know some who use it 12-18 hours post feeding for a more “sour” flavor. Potato does have the higher starch/sugar content so you could try omitting the maple syrup and see if that reduces the sweetness. the yeast in the starter should still have plenty of food for a good rise!
You forgot to say when we add the xantham gum.
Do you need to add xanthan gum if it is already in your flour blend? I am using King Aurthur’s gluten free 1:1 bread flour.
I made two loaves of bread using your recipe yesterday…. GF sourdough success! Such a simple recipe and so easy to make. Thank you so much for sharing!
I do not see where it say’s to add the xanthan gum? Thank you.
I do not see where it says to add the xanthan gum? Thank you.
I ordered a starter from you. What do I feed it with? My traditional starter I use bread flour, etc.
Alright y’all, for those wondering, do not add the xanthan gum to the psyllium husk slurry. It clumps together and is sticker than molasses.
I’ve had great success with sourdough bread but my husband is gluten sensitive so he can’t eat it. I tried twice to get a gluten free starter going and no luck. Any suggestions would be greatly appreciated. Your bread is beautiful
Where does the xanthan gum come in?